Quickstart: Image-to-Image and Inpainting
The goal of this tutorial is to help you get started with the image-to-image and inpainting features.
While the text-to-image endpoint creates a whole new image from scratch, these features allow you to specify a starting point, an initial image, to be modified to fit a text description.
We're going to use curl commands to show examples to make it easy to demonstrate. I included the seed parameter to make those reproducible, but of course you can omit this parameter to get a different result each time.
File uploads
From a technical point-of-view, the main difference is that you'll now have to work with file uploads to send your initial images.
There are two ways to format your requests to send files:
Content-Type: application/json: with JSON, you have to send the file as a base64-encoded string.Content-Type: multipart/form-data: with multipart, you can send the file as a binary stream.
Fortunately, with most popular programming languages / HTTP libraries you should have an easy way to handle file uploads. Please refer to the documentation of your tool of choice to get more info.
Example
You can find several examples in NodeJS / Javascript here: https://github.com/dezgo-com/example-nodejs-simple
Example
Example of a JSON request body:
{
    "prompt": "Stunning portrait",
    "strength": 0.97,
    "init_image": "{YOUR BASE64 ENCODED IMAGE}"
}
/image2image
This endpoint modifies an entire image. The modifications can be subtle or more drastic.
Let's take a look at an example!
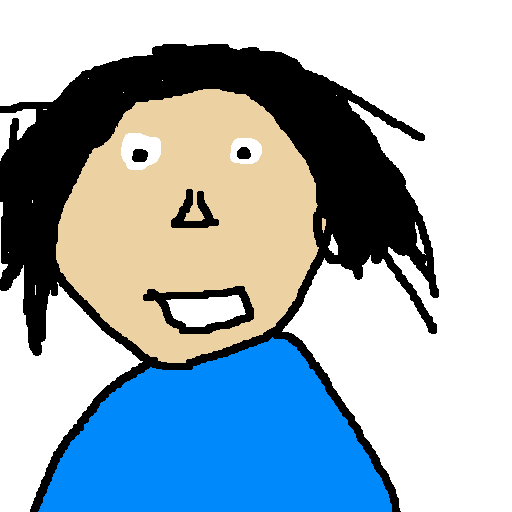
Prompt: Stunning portrait of a young woman, snowy background, digital art, highly-detailed masterpiece trending HQ
Initial image (pardon my poor drawing skills):
Result:
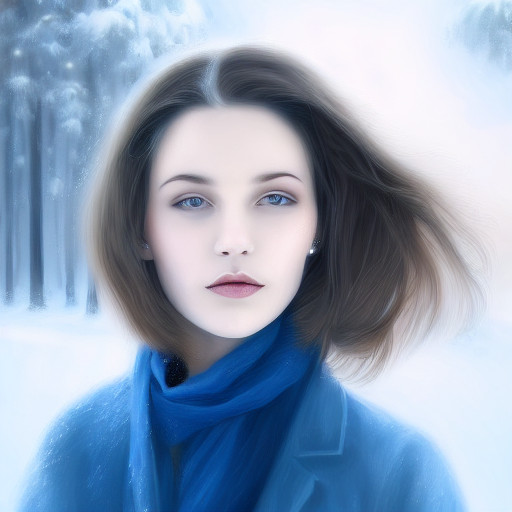
Much better, isn't it?
You can reproduce this example with the following command (assuming that you have the initial file on your disk as input.png):
curl -X POST \
    -H 'X-Dezgo-Key: YOUR_API_KEY' \
    -F seed=2942950965 \
    -F init_image=@input.png \
    -F strength=0.97 \
    -F 'prompt=Stunning portrait of a young woman, snowy background, digital art, highly-detailed masterpiece trending HQ' \
    https://api.dezgo.com/image2image > output.png
We'll go over the differences now:
init_image: this specifies the file to use as the initial image. With curl, we use the@character to read a file from disk.strength: this parameter specifies how drastic the changes should be. The range is from 0.0 to 1.0. At 0.5 the changes are very subtle, and at 1.0 the initial image is severely altered.
For example, here to go from "ugly drawing" to "masterpiece", I used 0.97 because I wanted the model to add a lot of detail. But I didn't go all the way to 1.0 because I wanted to preserve the overall "shapes" and their colors (a blue coat in the lower part, a face in the middle part, dark hair around the face, mostly white background)
The number of steps also plays a big role, as with more steps the algorithm will have more "time" to create new details. If you want only subtle changes, lowering the step count might be useful too.
You might need to go through a bit of trial-and-error to find the perfect values for your use case.
Tip
Try to describe the target image as precisely as possible with your prompt, not just the modifications, but the entire target result.
Describe the subject, the background, the style, even if you don't want to change some of those elements.
It tends to give better results.
Image dimensions
The output image will have the same size as the input, however the maximum size of any dimension is 1024 pixels. If any edge is greater than 1024 pixels, the image will be automatically resized to 1024 along this edge.
In addition, dimensions should be a multiple of 8, this is also automatically adjusted if necessary.
Be sure to use images that are close to the model's native resolution to achieve the best results. If the input image is too small or too large, the model may struggle to maintain good consistency.
Warning
Be careful with big dimensions, the same charges apply as the text2image endpoint.
To finish with the /image2image endpoint, here's another example with a smaller strength:
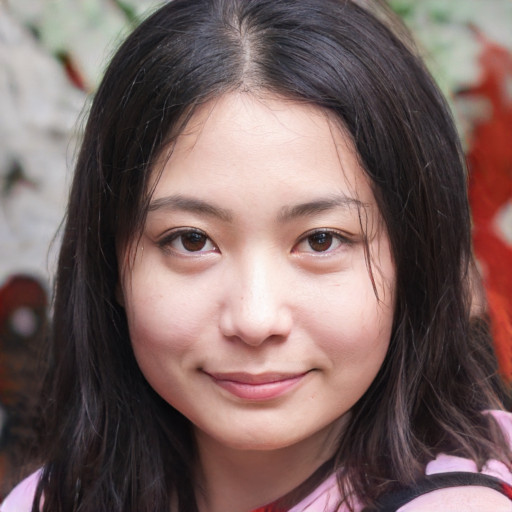
Prompt: Photo of a smiling asian female, highly-detailed, photo-realistic
Initial image:
Result:
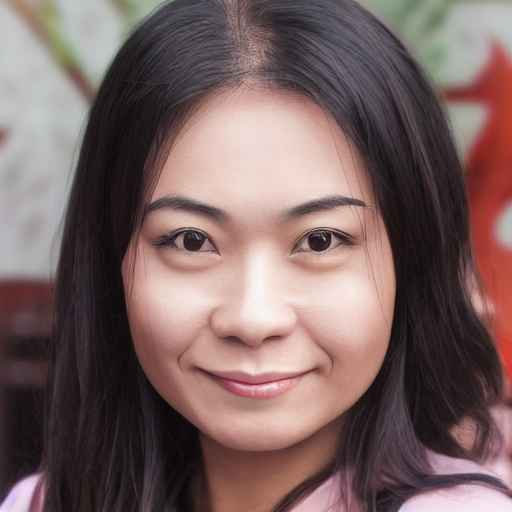
Here I just wanted to make the subject smile a bit more, but keep the overall content/style of the image identical. So I used a strength value of 0.4:
curl -X POST \
    -H 'X-Dezgo-Key: YOUR_API_KEY' \
    -F seed=371802434 \
    -F init_image=@input.png \
    -F strength=0.4 \
    -F 'prompt=Photo of a smiling asian female, highly-detailed, photo-realistic' \
    https://api.dezgo.com/image2image > output.png
/inpainting
Inpainting is a pretty exciting feature. Just like image2image, it will modify an init_image to fit your prompt.
But in addition it allows you to specify the parts of the initial image that should be changed. You might use it to remove/alter/add an object in the original image, without changing the rest.
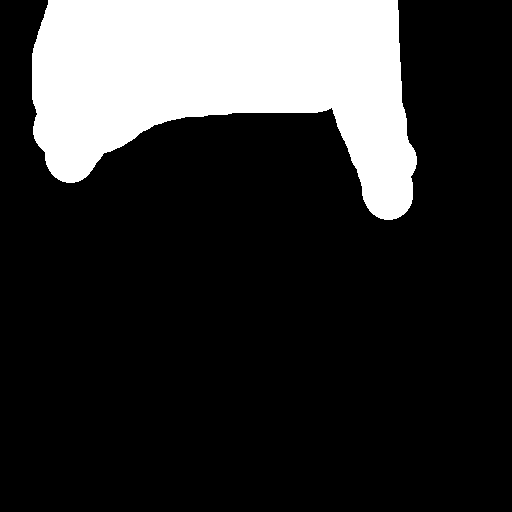
Specifying the parts that should and shouldn't be altered is done through a mask_image, which is another image file upload that:
- has the same dimensions as the init_image
- white pixels where things should be changed
- black pixels where things should remain identical
Without further ado, here comes an example:
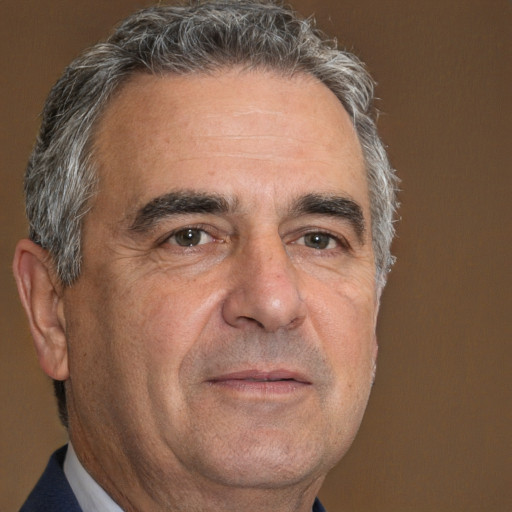
Prompt: Photo of a man with a cool mohawk haircut
Initial image:
Mask image (we want to modify the hair):
Result:
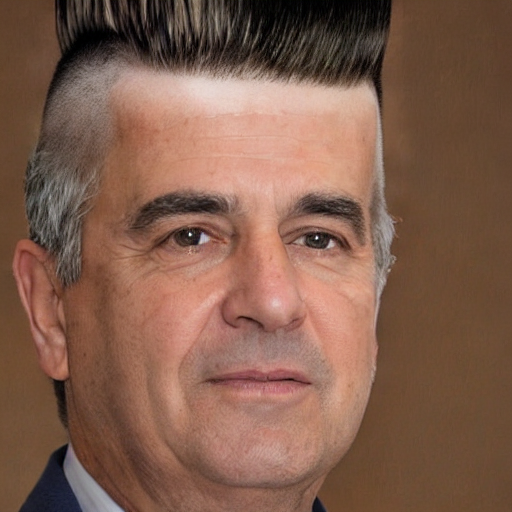
What a makeover!
You can achieve this result through this command (assuming that you have the initial image file named input.png, and the mask file named mask.png):
curl -X POST \
    -H 'X-Dezgo-Key: YOUR_API_KEY' \
    -F seed=1419651194 \
    -F init_image=@input.png \
    -F mask_image=@mask.png \
    -F 'prompt=Photo of a man with a cool mohawk haircut' \
    https://api.dezgo.com/inpainting > output.png
Just like image2image, it might require a bit of experimentation to get the desired result.
Info
Please note that the inpainting endpoint uses a different set of models that are specialized for this task.